Page 3 of 3
Re: I’m an idiot.
Posted: Mon Apr 24, 2023 1:39 pm
by the elephant
Re: I’m an idiot.
Posted: Mon Apr 24, 2023 2:59 pm
by bloke
...so you're on board with the suggestion (and from a "pro" to boot) then...??
Re: I’m an idiot.
Posted: Tue May 16, 2023 7:46 am
by Rick Denney
After a travel marathon, I made it into the shop yesterday to work a little more on the tuba. I need to seriously rag it out to remove all the burned lacquer (most of which that remains was burned when I bought it) and start work on the valves. I noticed that the fourth slide rang a little bit when removed, meaning the tubes didn't quite line up. They looked out of parallel so I nudged it a bit in my hands to bend the crook very slightly. Both solder joints where the inner tubes meet the crook ferrules popped loose--the solder joints are old and brittle.
Okay, that gave me an excuse to do it right.
For my machining hobby I have a granite surface plate which is tested to be flat to the nearest 0.0002" over its surface (making it "okay" for a "cheapie" surface plate--Grade B "for shop floor use"). I think that ought to be good enough for aligning slides, heh. Like all Alexander 163 designs, the fourth slide is fairly wide and it's too wide for standard 6" calipers. So, I hauled out the beautiful Swiss-made Etalon 12" calipers, which read quite accurately to about half a thousandth (the marks are .050 with a 50-division vernier spread out far enough to estimate halves, and measurements validated using my micrometers). Those calipers are beefy enough to use as a hard gauge when the moveable jaw is tightened. I aligned the slides to be plano-parallel using the surface plate and linearly parallel using the calipers, to within a couple of thousandths. After soldering, I checked it the same way.
Of course, then the outer tubes were about a tenth of an inch too far apart, which was the actual problem before. This didn't surprise me with all the damage the outer branches have taken--that outer fourth-valve branch has surely moved around. With the help of a foot-long piece of 11/16" steel shafting, I was able to reshape the inner branch to align with the slide, but I also removed the outer tube adjacent to the third valve branch to facilitate better alignment. Then, the brace between it and the third-valve branch grew too much. Rather than make a new brace (this one is just two half-rings silver-soldered back to back), I made a spacer to solder under one of the pads out of #6 copper wire. I annealed the wire, flattened it with a hammer, and hand-filed it to fit perfectly. Blokes and elephants would snigger, but it's on the backside of the instrument and I didn't want to remake the brace in case the tuba gets a real overhaul someday and the spacing is no longer needed.
Normally, I sight across one outer slide to check alignment with the other outer slide because the surface plate isn't an option there. But the fourth-valve branch wraps over one of the outer-branch tubes, which blocks the view of across both outer tubes. I used a machinist's parallel along one of them to provide a sightline for planarity, and the calipers for parallel distance. I had to release the solder patch where the fourth branch is soldered to the inner branch on its way from the valve. I solder all that down and now the slide nearly falls out of its own accord (or will when I clean all the crap out of the inside of the instrument).
Speaking of cleaning, I went to Tractor Supply to get a big plastic horse watering tank to use as a tuba bath. They had Rubbermaid, which was exorbitantly expensive. An off-brand that actually looked better to me was a little over half that price, but then I was told that they are only sold in threes--for that lower price. So, I ended up with three of them. I'll fill one with vinegar to use as an acid bath, and another with water and dish soap for general cleaning. These will be outside the shop so I have to use stuff I can dump on the ground without damaging anything. I'll make some lids out of plywood just to keep the insects and animals out of them. Most of my tubas could use a bath this year.
I've been neutralizing the flux acid using baking soda mixed in water, which dries leaving a chalky mess. It's going to need a bath soon.
Rick "ragging next" Denney
Re: I’m an idiot.
Posted: Tue May 16, 2023 9:32 am
by bloke
I suspect that your work space is much more clear than mine, you're probably standing up constantly, and that your methods may be more methodical (vs. bloke's, which tend to be more goal-oriented)...
...but I would encourage you to consider leaving several-hundred-dollars calipers put away, when (simply aligning tuba slides). Tubas are big and clumsy, we tend to concentrate on avoiding denting them (while changing their positions) and calipers could end up being slid onto the floor from a bench.
Harbor Freight calipers are what they are, but they ARE more than they WERE. Their 6-inch dial calipers now cost 50% more ($30...??) but - in my experience - are 50% better. I have a house one and a shop one, and both (recently replaced) are going right back to top-dead-center 0 (and to the center of the mark) - every single time (no matter how far they're extended). I also test them against each other...extending one to blah-blah, measuring the jaws with the other one that I own, etc. This is plenty good for tuba slides, and (considering that $20,000 factory tuba slides are - usually - at least 5/1000" off (end-to-end). It's really easy to exceed those specs without risking pushing calipers (worth more than the tuba?) onto the floor. Further, (now discussing using a machinists stone) there's not a single trombone playing slide tube that's manufactured perfectly, and - as picky as I am - not one that's remedied to perfection (manufacturing standards / hardness of materials)...but (considering the length) I just can't visually "see" coplanar over that many inches, so...and FINALLY, it's not atypical for any trombonist (regardless of playing ability) to begin to re-fug-up a trombone slide (not even bumping a slide against anything, but simply by imperfect slide technique) within hours of my "dialing one in" absolutely as nicely as I'm able.
Further, I only use a machinist's stone for trombone slides, and - even then - it's overkill...but there's no such thing (really) as a "good enough" stone...OK maybe (??) Harbor Freight sells one...??... (and I don't have room for BOTH an "ok" one and a "great" one). As much mechanical work as you've done over the years (and don't come back with some "my old eyes" stuff, please) I feel confident that you can eyeball coplanar over less than a foot. Further, moving a slide from a stone to a tuba can easily throw off coplanar - whereby (guess what?) once on the tuba, it needs to be eyeballed. I'm not suggesting that a quick glance will guarantee coplanar, but continual observation and reevaluation (while solidifying a tuning slide assembly) is (in my estimation) more than is done at some (yes: even European) factories.
Take all of this with a grain of salt...

(I would just hate to hear about your calipers hitting the concrete.)
Re: I’m an idiot.
Posted: Tue May 16, 2023 3:21 pm
by Rick Denney
Actually, this is the sort of thing I do with the floor as a workbench, while sitting on a mechanic's stool. I have workbenches, but they aren't arranged with the necessary clear space. The floor is also spill-resistant.
I also have cheapie calipers, but none that are 12" long. Yes, I was careful.
Yes, I can eyeball coplanar. But I have the damn surface plate, I might as well use it. :)
By the way, Woodcraft sells a far-east granite surface plate that is 12x18x3. It's reasonably priced and certainly in the "good enough" category. It's no Starrett, but as you say who needs that? When I have stoned a precision flat surface such as an angle plate, lifting it off the surface plate will impart a noticeably suction even when dry--that's pretty flat. But so far I've never needed to take that to the next level with scraping a surface in to get that extra digit of flatness. The cheapie plate wouldn't be quite precise enough for that.
Some prior idiot has lapped the legs on that fourth-valve slide, so it's probably never been very well aligned. I'll probably have to use heavy grease on it to keep it in place, or purposely screw up what I just made good.
But as bad as my dent work is, and as sloppy as my solder work is, at least there's one thing on this project I did to a reasonably high standard. Though that spacer made from copper wire for the brace to line up correctly would make you chuckle.
Rick "whose dent-avoidance strategy in this project is to keep everything at minimum kinetic potential (meaning: close to the floor)" Denney
Re: I’m an idiot.
Posted: Tue May 16, 2023 7:40 pm
by bloke
If you're into building slides, risers (which allow room for the c. .5mm-thick ferrules) and bars (as counterweights for the slide bow) are handy...and - LOL - an arms-level bench.
You probably already have those things...
Since Ferree's sells to anyone (and tends to offer better tools than Spacely Sprockets...well...you know...), you can become semi-addicted (before you get sick-to-death of it).
NOT repairing the same dozens-of-times formerly-unsmashed instruments (every summer - when others visit their friends, barbecue, travel, etc.) probably would help to NOT become sick of it.
Re: I’m an idiot.
Posted: Tue May 16, 2023 8:21 pm
by Rick Denney
Oh, yeah. I like knowing how to fix things, but knowing how to fix things to keep them working properly and knowing how to fix one kind of thing to an artistic level ain’t the same thing.
By the way, tonight’s bit of Tripoli ragging and buffing reached no conclusion. I need to bring down the Foredom from my horology bench and wait for the pile o’buffs on Dremel 1/8” shafts to arrive from Amazon. Then, maybe I can reach some spots that are too easy to see and too hard to get to.
But I did spend a little time on the valves. The front bearing of the first and second valves were quite loose. I used the trick you mentioned. I have a set of ER32 collets and a holder for an R8 spindle (not that I own a mill) and used that to swage down the bearings. Worked pretty well. There is longitudinal play as well, but I can’t yet think of a way to chuck up those back plates to turn them down a hair. I’m pondering it. I will probably have to make a fixture.
Pics for today:
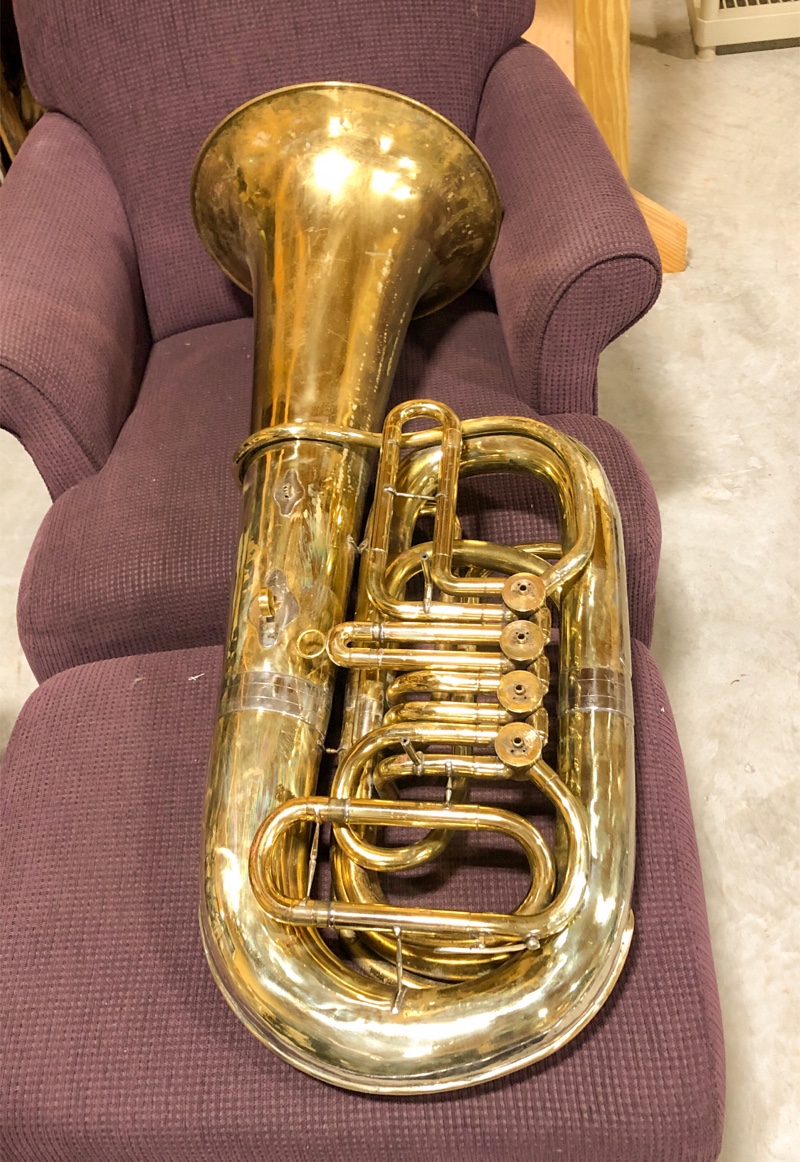
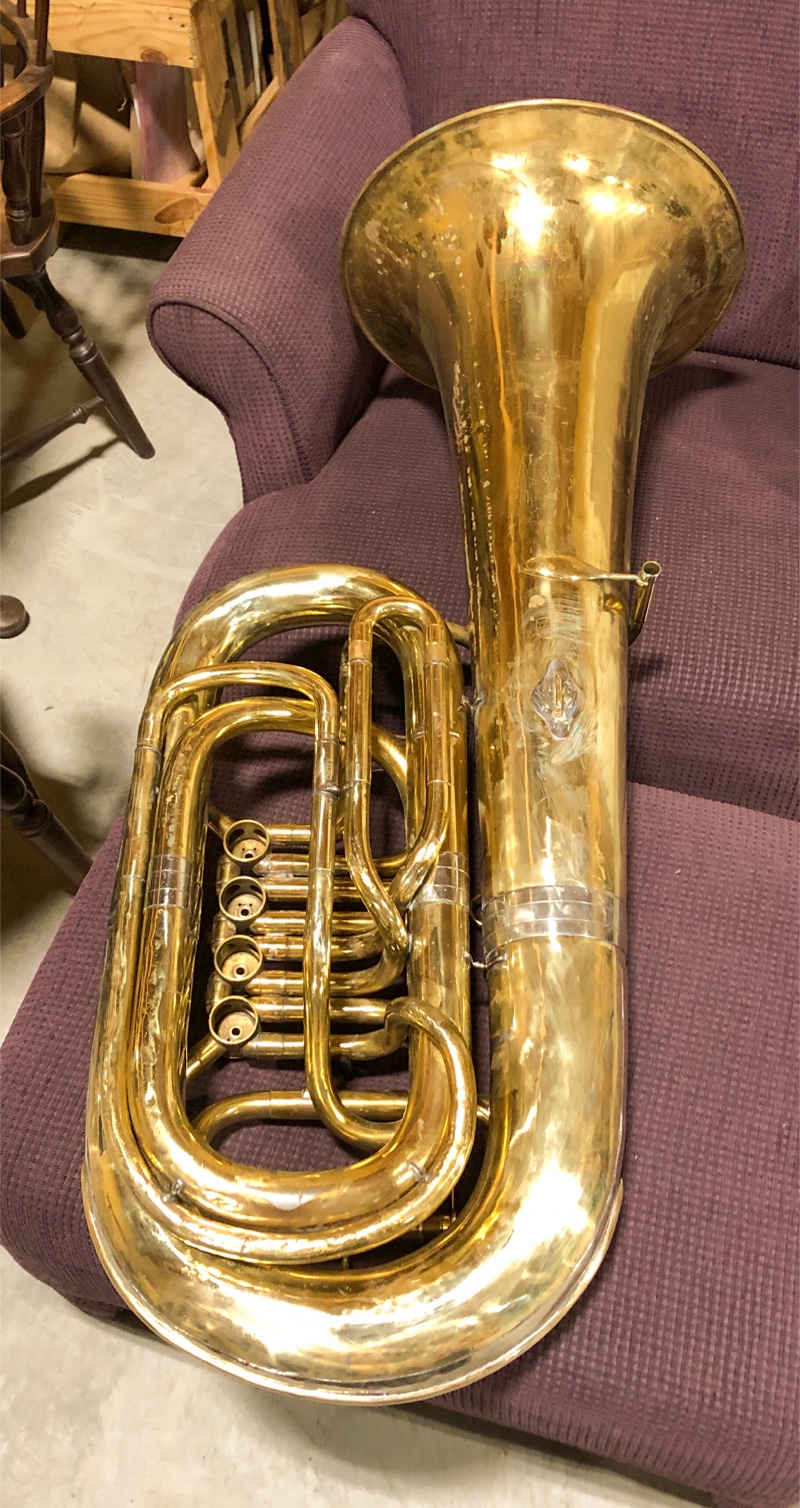
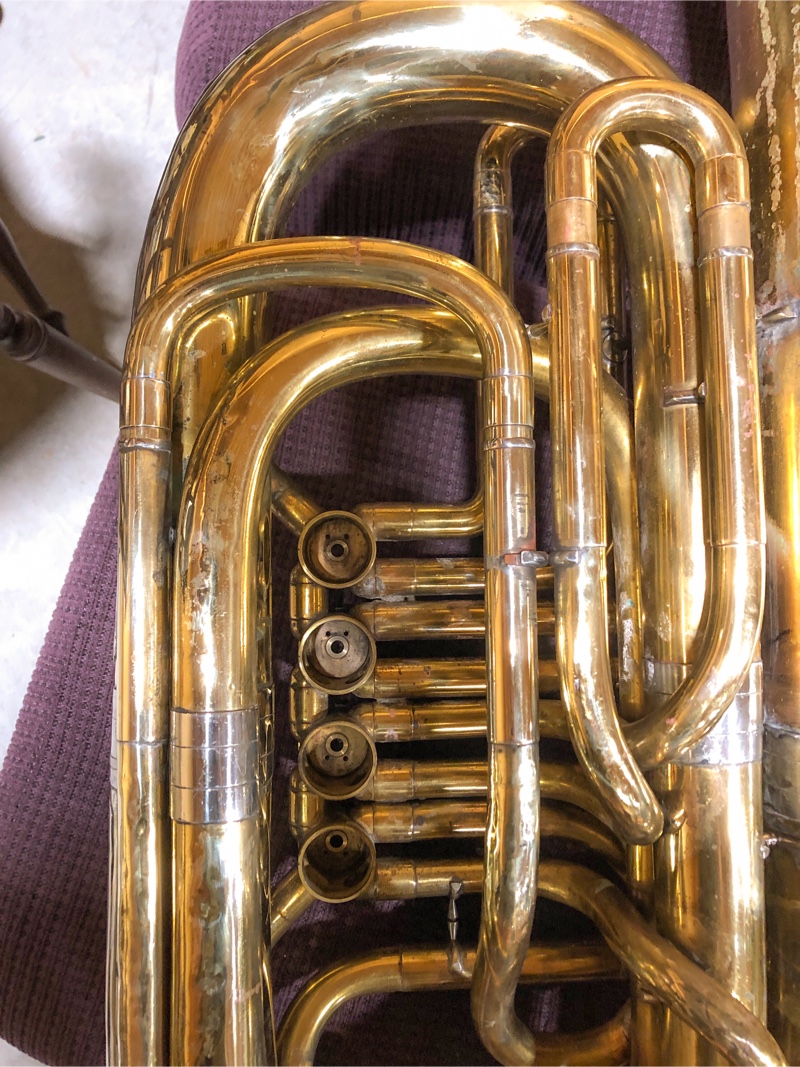
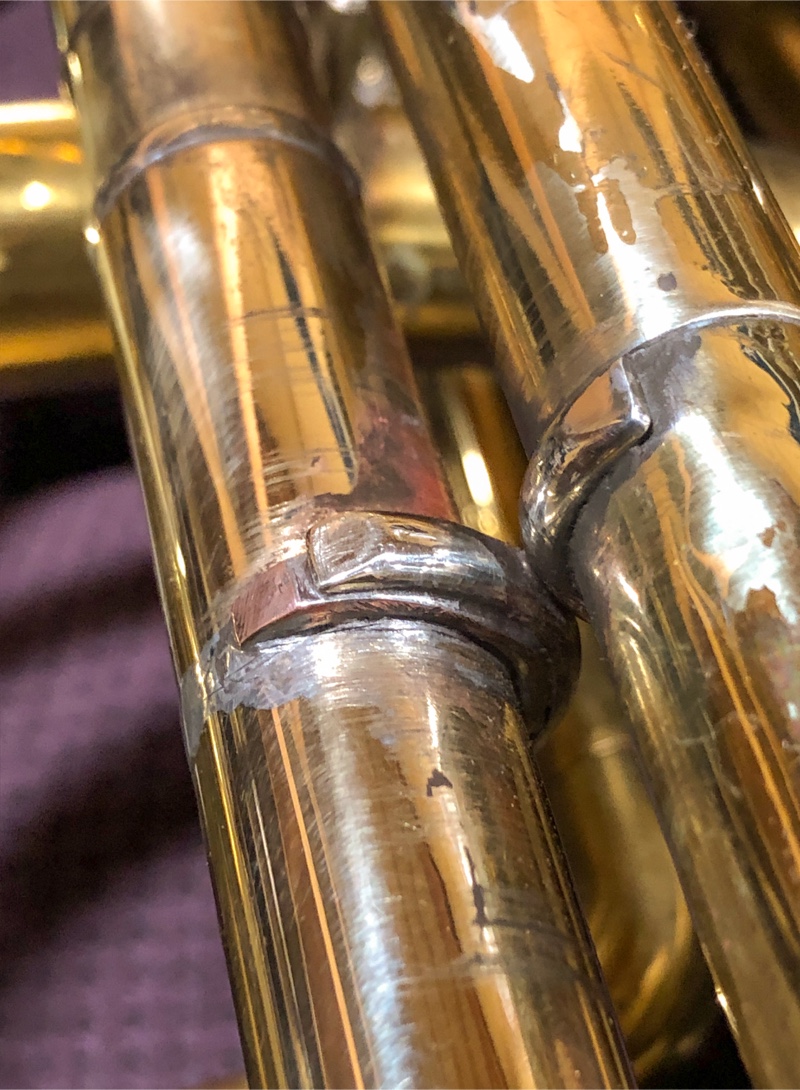
Rick “let the sniggering begin” Denney
Re: I’m an idiot.
Posted: Tue May 16, 2023 8:47 pm
by YorkNumber3.0
.
Re: I’m an idiot.
Posted: Wed May 17, 2023 10:01 am
by bloke
YorkNumber3.0 wrote: ↑Tue May 16, 2023 8:47 pm
Might want to leave a little burnt lacquer. Pretty sure it’s the mark of a professional technician that worked on their own horn.

Guilty as charged. If I'm going to shine up stuff it's going to be a year or two later or perhaps right before I sell one of my personal instruments, because you won't find me polishing instruments without being paid.
===========≈====
@Rick Denney
You might just consider putting those bearings in your chuck and only gingerly tightening it down. It's really common for those bearings to be loose anyway, and shaving off a scant number of thousands of an inch off of the shoulder isn't going to require much time nor much torque. This is no where close to the correct way to do this, but it will work, and you won't have to buy anything. Another method would be to turn down a brass screw until it fits (with a little bit of a trapezoidal taper) in the hole in the middle of that bearing plate, screw it down on a really straight piece of all thread, and put all of that stuff together in your chuck while messing with it a little bit to get everything nice and straight. Again that's not the proper way to do it either but it's another way to do it without buying anything. Turning down the threaded brass nut to a cone shape will help you make it tight against the hole in the bearing plate, but you already figured that out.
Finally, if the bearing plates have a shoulder on them - which I believe they probably do, you don't have to turn them down, but can just take a 2-inch wide fine teeth tone hole file for a saxophone and file a couple of thousands off the backs of the rotor casings until you remove the play. You can do this by hand - obviously - without any special machine tools.
Re: I’m an idiot.
Posted: Wed May 17, 2023 10:27 am
by Rick Denney
bloke wrote: ↑Wed May 17, 2023 10:01 amYou might just consider putting those bearings in your chuck and only gingerly tightening it down. It's really common for those bearings to be loose anyway, and shaving off a scant number of thousands of an inch off of the shoulder isn't going to require much time nor much torque. This is no where close to the correct way to do this, but it will work, and you won't have to buy anything. Another method would be to turn down a brass screw until it fits (with a little bit of a trapezoidal taper) in the hole in the middle of that bearing plate, screw it down on a really straight piece of all thread, and put all of that stuff together in your chuck while messing with it a little bit to get everything nice and straight. Again that's not the proper way to do it either but it's another way to do it without buying anything. Turning down the threaded brass nut to a cone shape will help you make it tight against the hole in the bearing plate, but you already figured that out.
Finally, if the bearing plates have a shoulder on them - which I believe they probably do, you don't have to turn them down, but can just take a 2-inch wide fine teeth tone hole file for a saxophone and file a couple of thousands off the backs of the rotor casings until you remove the play. You can do this by hand - obviously - without any special machine tools.
Probably filing the back of the casings would be easiest, but it's not an easy place to do filing.
These do have a shoulder, so would need to be turned down in two places. That really doesn't scare me. But holding them by the bearing ring seems to me a recipe for disaster. Chucking them by that ring in a four-jaw chuck and then clamping it through the lathe spindle using a long piece of all-thread would be a big improvement. But my four-jaw chuck is 10" in diameter and I'm not sure it will close enough for that tiny bearing ring, or that I could indicate it in without pushing something a bit too hard.
But it wouldn't be difficult to make a fixture. A cylindrical piece of steel about the diameter of the rear plate, with a bored opening that is a snug fit on the outside of the bearing ring (for accurate location), and threaded hole in the middle for a clamping screw. Then, I could indicate it in without worrying about too much pressure from the chuck jaws, and I wouldn't be trying to fit a fixture to the tapered part on the inside of the bearing ring. The fixture would support the backside of the bearing plate solidly. Any wiggle or looseness at all would be a disaster. If I made the fixture in the lathe, I could just leave it in the lathe after turning it and wouldn't even have to indicate it in to do the machining.
A really sharp steel cutter with a sharp point instead of the usual radius could face off the underside of that shoulder by a thousandth or two. Facing off the inside of the plate is easy.
But I probably could use a tone-hole file in my kit anyway :)
(Truth to tell: One could probably just support the rear being plate on a ring just inside the rim and press it with a close-fitting donut around the bearing sleeve in an arbor press just to dish it slightly. It's malleable brass after all. That would probably last another 50 years.)
Rick "in the clock/watch world, the part would be glued to a turning plate using lacquer" Denney
Re: I’m an idiot.
Posted: Wed May 17, 2023 11:14 am
by Rick Denney
So, for lacquer. I'm approaching a crossroads. I do not really want to lacquer this instrument because that will leave all my imperfections as obvious as possible.
But there is still a lot of patchy lacquer left here and there, and part of that is what makes the instrument look old and interesting.
When Joe worked on my Holton, he spot-lacquered the parts that had been stripped during dedenting, and tinted the lacquer to make it look old. He also (dangerously, as he admitted at the time) went over it with the heat from a torch to slightly color it a bit more, but not enough to actually burn it. I think if I attempted that I'd burn my shop down.
My suspicion is the gold-tint Nikolas lacquer that Ferree's sells will be the wrong color. The lacquer color I'd like would be called "old and yellowed." (In the watch industry, one can buy the "Superluminova" luminous paint used for dial hands in various colors, one of which is called "old radium".)
Or, should I buy stripper instead and remove the rest of the lacquer to let it brown gracefully and sort-of uniformly?
What say you, oh TFFJ?
Rick "leaning towards the stripper" Denney
Re: I’m an idiot.
Posted: Wed May 17, 2023 11:47 am
by bloke
I don't believe you can by stripper, anymore, that works worth a crap.

I’m an idiot.
Posted: Sat May 20, 2023 10:10 pm
by Rick Denney
I’m just about done.
Today, I cleaned it thoroughly. I have three 100-gallon watering troughs. In one I put 30 gallons of water and two gallons of 45% acetic acid (which makes it similar to common vinegar). In the other I put water and Dawn dish soap.
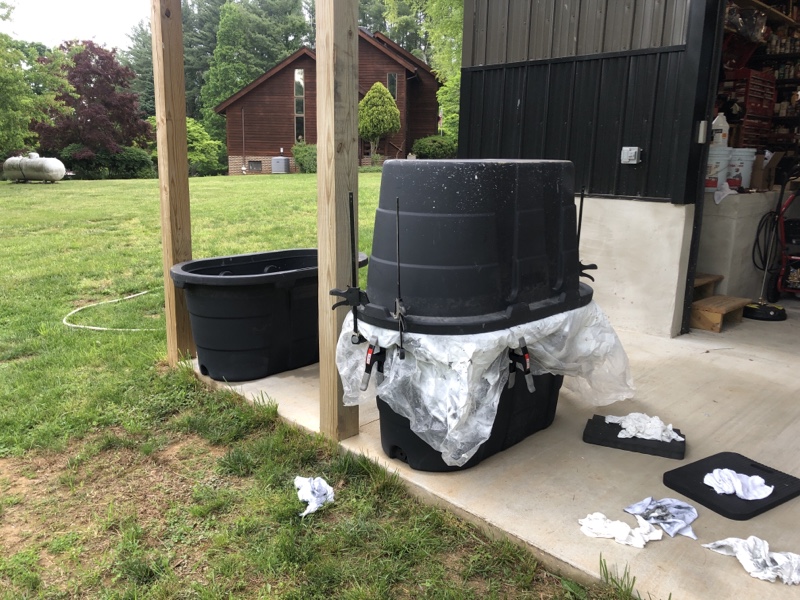
(The third tub became the lid for the acid bath.)
The Dawn was first with a lot of scrubbing thrown in. That got it fairly clean and degreased but it did nothing to remove calcium deposits. After a rinse, I soaked it in the vinegar for a couple of hours. That clearly pickled all the bare brass, so the acid was strong enough to remove calcium. After a rinse, I polished that pickled brass using Wenol, which is similar to Semichrome, to remove the pink. Then, back in the Dawn to remove the polishing schmutz. Here it is after rinsing:
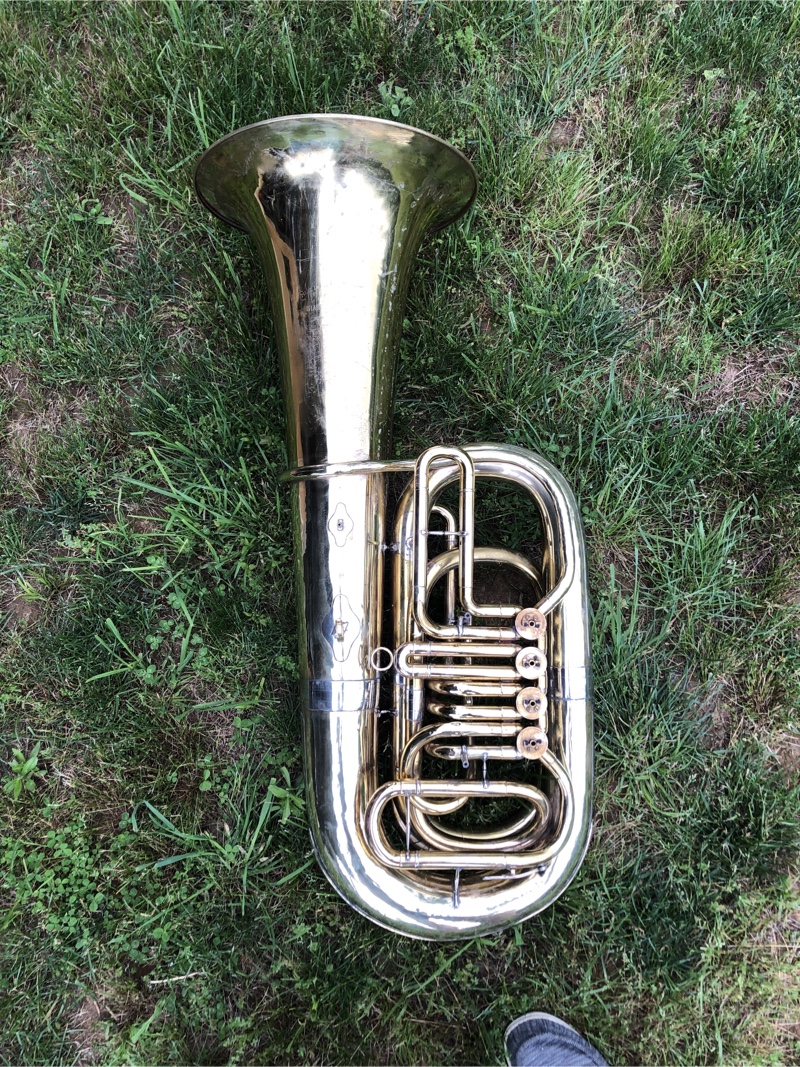
Where the bottom bow was bashed in:
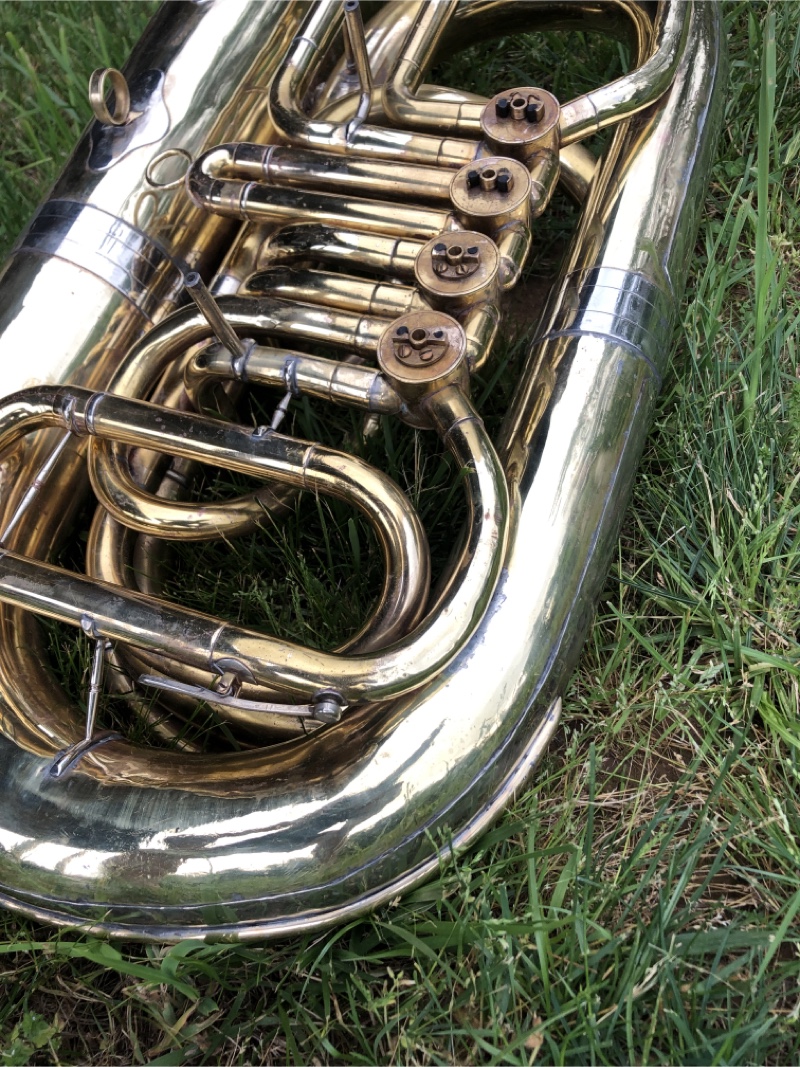
Where the top bow was bashed in;
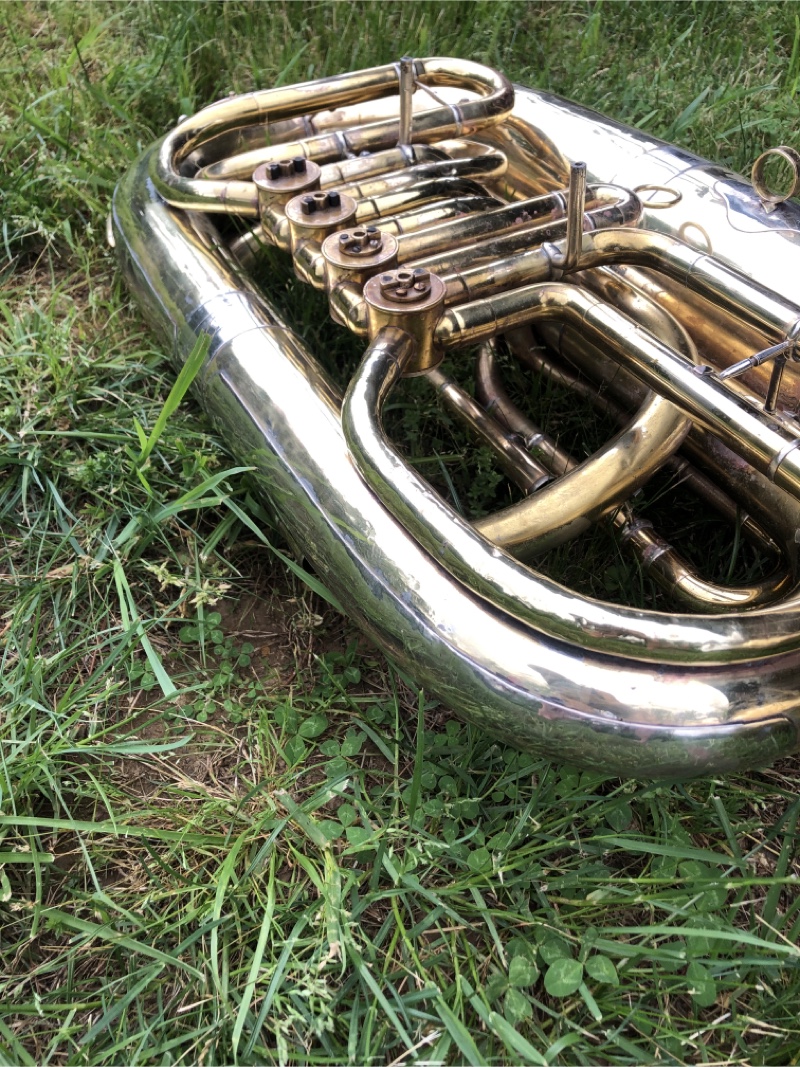
The broken brace that I silver-soldered together a couple of days ago:
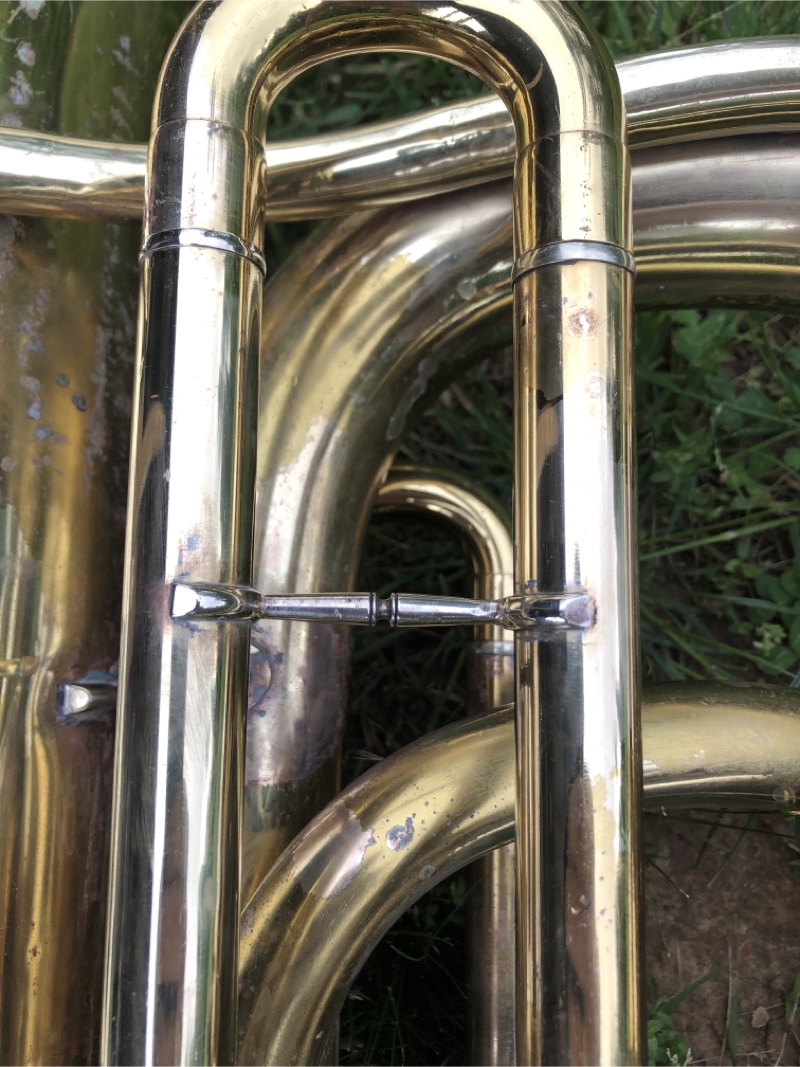
The much uglier backside:
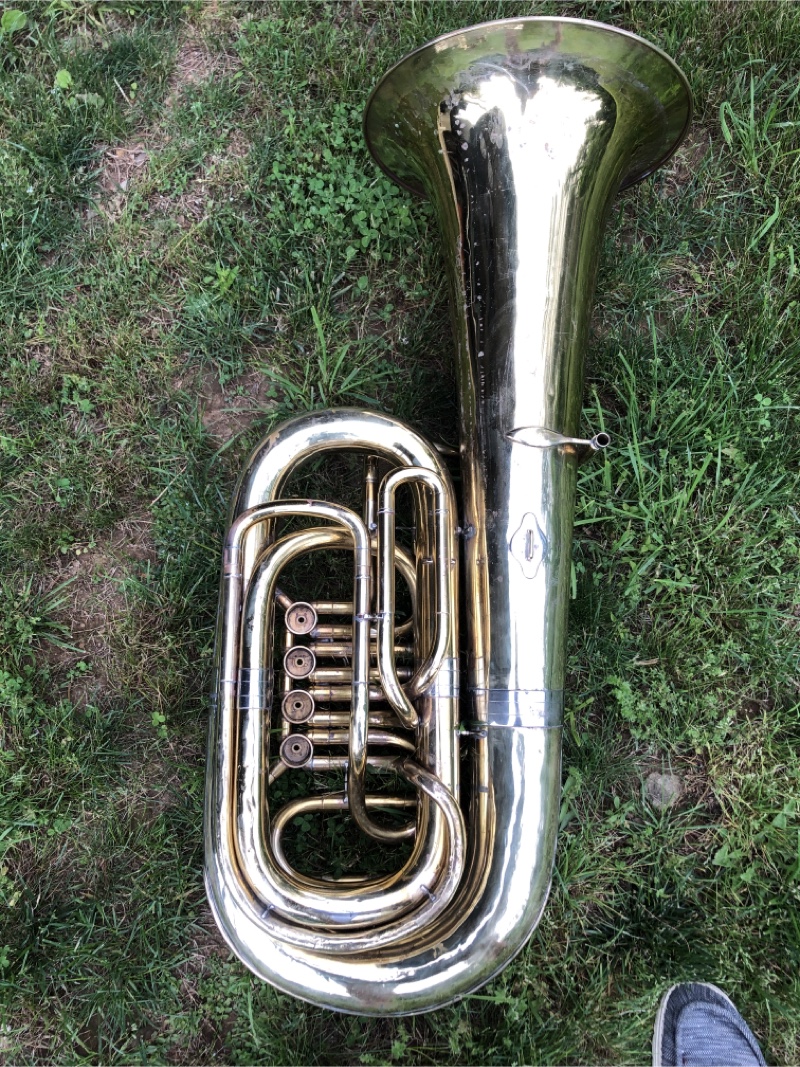
The fourth valve slide that took so much effort:
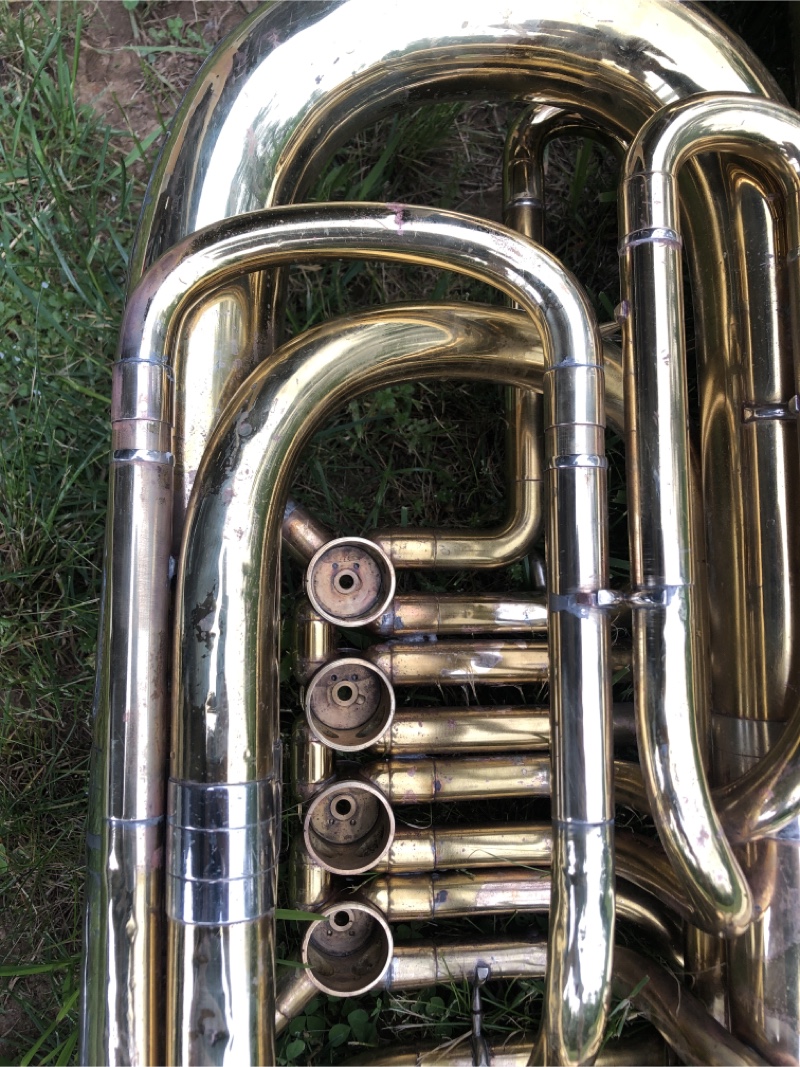
The reinflated (sort of) fourth valve branch:
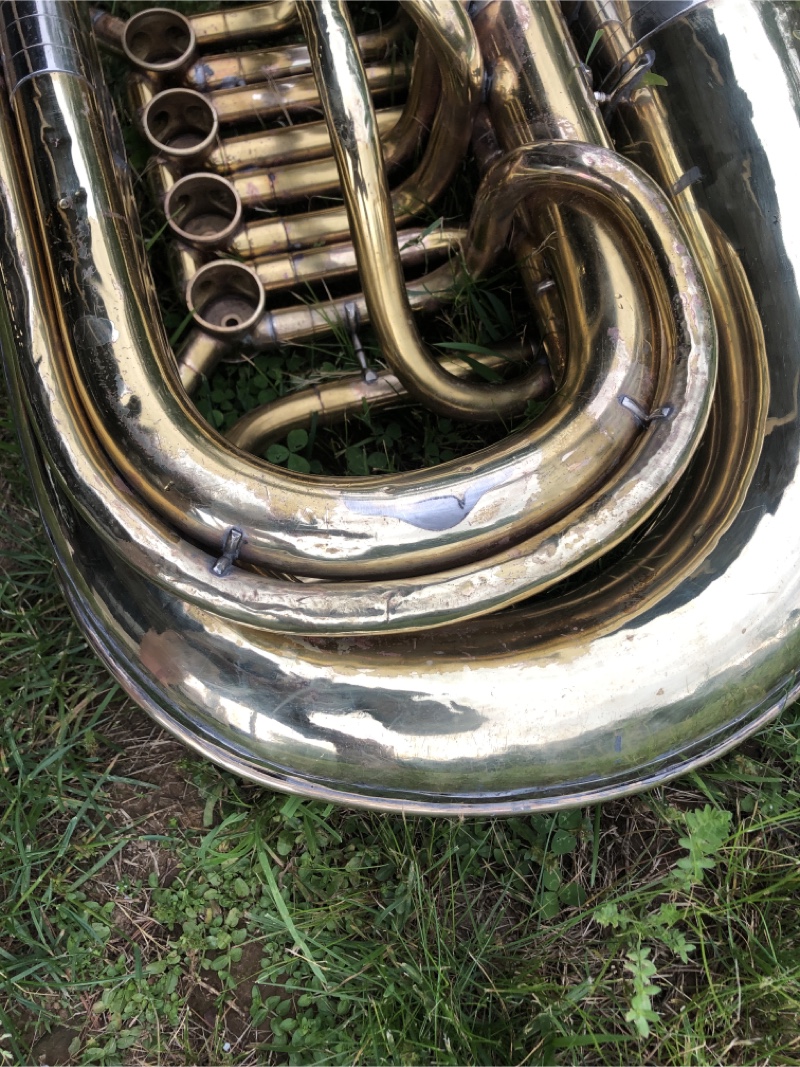
I think most repair techs would have replaced it, or even bent a new one.
Yup, it used to have a kranz:
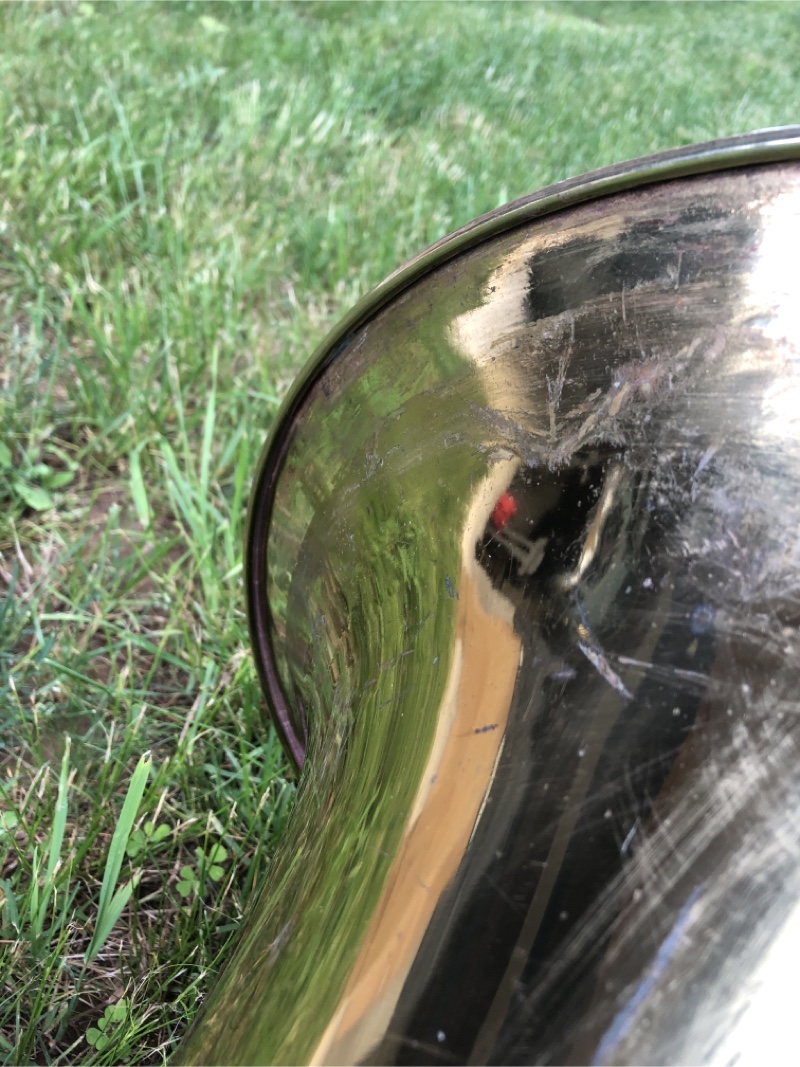
Tonight, I discovered one of the first valve slide outer tubes had broken loose, along with the non-original brace behind it. So, I had a little more soldering to do.
I cleaned the valves in my watchmaker ultrasonic cleaner. That set of chemicals is awesome—they came out looking new.
In the end, I took up axial play by cutting shim washers to go between the valve and the rear plate. The first valve required 0.007” and the third valve needed .010”. The other two were close enough. I swaged the front bearing on 1 and 2. They are not perfect, but they work well enough and do it reliably. I tightened up the T-bearings on the S-links, and need to work on the connections to the stop arms. Bloke provided me some advice and parts for that, which I will do later.
With alignment and lubricants, everything works as it should. I got to spend about an hour just playing it. It still plays beautifully, with a punchy, colorful sound and excellent playability. Intonation is quite good. The valves are worn, but that doesn’t seem to be a constraint just yet.
I decided to just let the finish look terrible for now. Maybe I’ll strip the remaining lacquer at some point, but that can wait.
Now, I can clean up the mess and move on to the next project.
Rick “wishing it still had the kranz” Denney
Re: I’m an idiot.
Posted: Sun May 21, 2023 6:03 am
by bloke
Great !!!
Different methods for uncrushing that big loop of fourth circuit tubing (that's so vulnerable) are to put a .740" or so dent ball on a braided bicycle brake cable, push it down in there with a strong flexible braided steel cable - pushing out dents, and then pull it back out by the bicycle brake cable, and maybe also annealing that tubing prior to running a ball through it. A touch up can involve using the same .740" ball in conjunction with a strong magnet and doing some burnishing.
When pulling the ball back out with the bicycle brake cable, the braces should all be checked for being soldered very well, so as not to destroy and that entire big loop of cylindrical tubing via collapsing it when pulling out the ball.
Re: I’m an idiot.
Posted: Sun May 21, 2023 7:23 am
by Rick Denney
I’ve already pulled a .735 ball through it. I have a .745 ball, but couldn’t get it through the ferrules—.003 isn’t enough under the .748 nominal bore to account for even clean soldered joints.
I can turn a 740 ball from some 3/4” stock. Maybe I’ll do that this afternoon, but I’m inclined to leave well enough alone.
Rick “ruined more than one project by going too far for the skills available” Denney
Re: I’m an idiot.
Posted: Sun May 21, 2023 3:36 pm
by bloke
Rick Denney wrote: ↑Sun May 21, 2023 7:23 am
I’ve already pulled a .735 ball through it. I have a .745 ball, but couldn’t get it through the ferrules—.003 isn’t enough under the .748 nominal bore to account for even clean soldered joints.
I can turn a 740 ball from some 3/4” stock. Maybe I’ll do that this afternoon, but I’m inclined to leave well enough alone.
Rick “ruined more than one project by going too far for the skills available” Denney
.735" is wonderful.
Almost all bent 19mm bore tubing (that which is bent without being "balled") is ovaled at least that much at the bends.
Re: I’m an idiot.
Posted: Mon May 22, 2023 1:48 pm
by Tubajug
That's looking great, Rick!
For stripping lacquer, I've had good success with Ferree's Z 22. It's a gel that you brush on, let it sit for a few minutes, then rinse off with water.
Re: I’m an idiot.
Posted: Wed May 24, 2023 12:12 pm
by bloke
As far as instruments looking better from a distance is concerned, I used to have this guy who was pretty talented and very smart working for me; he would do buffing but he was also good at straightening out tubas and sousaphones.
When he would finish polishing an instrument, he would bring it out and ask, "Does this one pass the paint shaker test?"
In other words:
"If you hooked that instrument up to a gallon can paint shaker and turned it on, would you be able to see any of the imperfections?"

Re: I’m an idiot.
Posted: Wed May 24, 2023 3:04 pm
by Rick Denney
bloke wrote: ↑Wed May 24, 2023 12:12 pm
As far as instruments looking better from a distance is concerned, I used to have this guy who was pretty talented and very smart working for me; he would do buffing but he was also good at straightening out tubas and sousaphones.
When he would finish polishing an instrument, he would bring it out and ask, "Does this one pass the paint shaker test?"
In other words:
"If you hooked that instrument up to a gallon can paint shaker and turned it on, would you be able to see any of the imperfections?"

Heh. This would look a lot better if it wasn't shiny. And it looks better in daylight photography where that broad expanse of sky blows out highlights and hides all sort of imperfections. Indoors, with lots of little point lights, those imperfections become far more visible. But it is what it is.
Rick "it's out of project status and back to player status for now" Denney
Re: I’m an idiot.
Posted: Wed May 24, 2023 5:58 pm
by bloke
The challenge - when things because huge, like tubas - is for the dent removal and the polishing jobs to look as good as if they're as small as piccolo trumpets.
yes...everything shows.
Satin finishes are the repairmen's friends.
CUT IT TO C !!! 
