1971 Mirafone 186 CC — A Continuation

Projects, repair topics, and Frankentubas
User avatar
the elephant
Posts: 3321
Joined: Thu Aug 13, 2020 8:39 am
Location: 404 - Not Found
Has thanked: 1861 times
Been thanked: 1297 times

1971 Mirafone 186 CC — A Continuation

Post by the elephant »

Okay, so I have been salvaging my old TN thread on the two 186 tubas. One day (I hope) it will be refined and cleaned up enough to post it as a PDF file for anyone who wants to read it. For now, it is unavailable, so this thread will be ONLY about the CC tuba. The BBb 186 will have its own thread.

For any here who never saw the old thread, here is a brief history of this tuba's restoration.

I bought the horn from a former TubeNetter to help him out. He had been trying to sell it for about six months (I think) and was having no success. The horn was supposedly a gem, musically, but it was in so-so mechanical condition, had hundreds of very shallow, dents and flat spots, lots of good, clean work but lots of ugly work, too. It had two big issues, though, that kept the horn unsold despite the low price.

• 4 valves
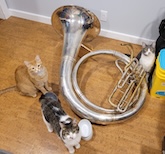
• Large green areas from pet urine (heh, heh, heh — don't ask…)

What I saw in his photos was an old 186 with a lot of unhappiness, but (so far as I could tell from the photos) no major damage to the bell or outer branches. The bell and outer branches all had a lot of minor damage, but I could not see any of the classic telltales of a crushed bell or bottom bow, no crease marks, no cracks or holes… nothing bad at all. The leadpipe did not fit at all but was sort of bent up and forced onto the horn. This was due to a huge error by the businessman who sold it to the previous owner.

Also, I could see *no* damage to the inner branches or valve runners. Other than all the multitudinous dents and flat sections in the bell "stack" and flare and the beat up outer branches the tuba looked really good to me.

[SIDEBAR: I call the brass lengths of slide circuit tubing that are not the actual outer slide tubes "runners" out of habit from a job I had many years ago. It is a descriptive name to be used generically, but not everyone knows what I am talking about when I use that word. So now you know. Also, everyone seems to number branches differently. I was taught that you had the bell and the two outer branches or bows. ALL of the bugle branches are bows, and ALL of the bugle bows are branches. Therefore, the bottom bow is the FIRST BRANCH. The top bow is the SECOND BRANCH. The inner branches start with the third branch and run through the bugle until you reach the valves or the main tuning slide. On a 186 that means the pretzel-shaped branch that bends around to the MTS would be the FIFTH BRANCH on a 186/188. This is the system that *I* use and not necessarily "correct" as not even the manufacturers are consistent with these terms. This system makes the most sense to me, so that is what I am using when I refer to branch numbers. Miraphone calls the 4th branch the "inner top bow" sometimes, for example, and Conn-Selmer calls the bottom bow the "bow" and the top bow the "1st branch" or "large branch". It depends on which parts sheet you look at.]

After Dan and I had talked about how to better photograph and "package" the horn to help him sell it he got busy with work. He needed money for a new baby room and had not played tuba much in the past year. I tried to steer some buyers to this tuba, but no one was really looking.

I was broke and also not looking for a 4/4 CC as I own a very nice 410 that Tom sold me back in 2015.

And then money fell out of a tree.

I met Dan on the UNT campus in Denton to buy it in early August of 2018.

I heped Dan out with his need for an adequate room for his new baby. I felt good about that. I could clean up the horn and then sell it for a better price at my leisure. This was a win/win situation.

When I got it home I realized that Dan had not be exaggerating about how well it played. I loved it. I cleaned off all the green corrosion from the "poochy pee-pee" and worked on the valves. I took it to a rehearsal where I had planned to use the Chinese 410. The trombones loved it. Right then I decided to not flip it but completely restore and upgrade it to use at work. It was a real surprise to me, as I had only thought to helping Dan out and then flipping it.

So, here is a bulleted list of what I did to it.

Stage I
• Remove thick, green corrosion from most of bottom bow
• Work on Dubro links to improve alignment and action

Stage II
• Replace links with Minibal links used by Miraphone
• Replace arms with parts used on St. Pete tubas

Stage III
• Complete evaluation of every part to compile a shopping list
• Study 410 tuba's 5th valve section and compile a separate shopping list of needed parts
• Order what I could afford at that time
(What I could afford at that time turned out to be very little, which was a good thing as Christmas gig time was upon me and I had to stop work and earn gobs of gig cash.)

During this time I stumbled across an old (well, NOS from the late 1990s) Miraphone valve I had traded gotten from a TubeNetter. It was not what he wanted. It was an odd bore size that he could not find on any of their horns. When I got it I posted a thread about it. I was told by Matt Walters that it was most likely a 186 valve because sometimes the knuckles are of thicker tubing that fits on the outside but is actually a few thou smaller than the very thin slide tubing they use. Others thought it might be for a 185. I had no use for it, boxing it up and burying it among my boxes of rotary valves.

After 2019 was wall underway I caved on the money bit and decided to buy a 5th valve from Stregge. He sent me what he had, which was his last 5th valve from a large batch of replacement valves he got from Mirahone many years ago. It was not a modern valve, but this intermediate one they no longer made. It did not have the engraved/stamped figurations on the front face like the old valves, but it was new and was an actual 5th valve with the correct porting. I because a bit obsessed with the fact that it would not look the same as the other valves. Yes, I know how stupid this is, but it was how I was thinking at that time.

One day, while looking for something else, that odd Miraphone valve popped back onto my radar. It physically look just like the 5th I had purched from Ed Stregge. In fact, both had idenfier marks written on them in Sharpie in the same hand. Curious, I took both apart and they were identical in every way except for the rotation direction and the obvious special port directions used on the 5th valve. And then I noticed that all four of the other valve's knuckles had internal flashing. Once I de-burred those ports the two valves read exactly the same on my calipers: .769"/19.54mm (or close enough for me to understand that the extra valve was indeed a 186 valve and not some smaller one).

This led me to a big decision. If I am going to dump this much money into this old tuba I want to do it right. I already had two of the needed five vlves, so I wanted to purchase the other three, as well as all new slide tubing to replace the worn and leaky ones on the horn. This would give the tuba all new bearing parts. It would mechanically be a new horn that was using classic bugle parts and runners.

The next "foolish expenditure" was based on that same "do it right" idea I had: all new nickel silver trim and bell garland.

Stage IV
• Inner/outer slide tubing
• Three more rotary valves
• All the small bits for the rotary valves
• Kranz
• Bottom bow guard
• Top bow guard

Then Miraphone informed me that they no longer had in-house engravers as they had not produced the fully engraved bell garlands in some years. However, there was very fine engraver that they worked with from time to time who could do it for additional money. I took the bait and spent the cash.

Years ago I had purchased one of the "new" 5th levers used on the 191 and later on all the 18x series horns. It was a very nice kit that I had planned to use one day on something. I had not expected that to be a 186, though. It needed some screws and the Minibl end links.

Stage V
• More valve link parts
• Paddle rack "axel"
• Lots of other small parts

This has added up to nearly what I spent on the tuba. Since it is one I intend to never sell the price is still within reason for what I will have in the end. And since I am doing all the work I get a very cheap rate per hour. :laugh:

There are more parts that have been ordered, but they will be what I am posting about in this thread as I add them to the horn.

So far, I have disassembled the whole horn, used my dent machine (really a "ripple smoother" as you still have to remove the dents first) to return the bell and outer branches to as close to new in appearance as I can. I am mostly very pleased with how these parts came out. I reassembled the bugle with the new guard plates. I purchased a new keel, but know that this horn will end up sitting on it on asphalt and cement a lot. I did not want to see it get all chewed up, so I opted to use the old one after cleaning it up with the sander and buffer. It fit the horn better, anyway.

The valve section had to be fully taken down to remove each vavle from its runners, some of which were fused to the connecting ferrules. I cleaned up all the runners and reassembled each slide with very careful alignment and eventually figured out how to get everything together so that all the contact points with the bugle, leadpipe, and MTS met up. It is off by 3mm at the bottom and I inserted a tiny brace between the water key elbow and the 5th branch.

The horn went back together with the new valves and the added 5th valve with great difficulty for me. I had to tear it down twice to get things where I wanted them. (It turned out that one of the parts needed for alignment had been bent since it had been removed from the horn, screwing up everything. I fixed it and the next attempt to put stuff back together went much better.

The 5th slide loop parts I had were provided to me by Wessex. I ended up only using the two weird parts and scrounging the rest from my parts bins. Everything is Miraphone, and mostly from the same era. (The lower 5th slide uses outer legs from a 1978 186 and has end rings with a slightly different appearance.) All the other parts will get used on an upcoming project.

I got the horn back in playing shape (but still ugly and dirty) and decided after about 30 minutes of testing that the currently used 5th lever setup that I bought years ago DOES NOT FIT MY HAND (or likely many hands, for that matter). I did an informal poll here and on Facebook and discovered that NONE of the respondents liked it if they had used the old style lever as well and could compare them. Users who had never used the old style one mostly said that they were not really pleased with the one they had, but that it was "okay". I decided to spend another $200 and buy an old-style lever and its various parts, to include the shorter linkage rod.

I am much happier with the new "old" lever, to the point that I will spend that same extra money for the cut BBb 186 when I get it to that point. The other style lever will be used on an upcoming project.

Why did Miraphone change such a good lever to what they have today? Cost, probably. This new style has more parts, but they all are faster (therefore less expensive) to make, and the "new" system seems to solve the issue where the old style lever could snap off of the 1st slide outer tube fairly easily. But the hand position is terrible.

I fixed my old-style lever bracket by silver soldering on a very large foot to give the bond to the 1st slide a chance to survive lots of impacts and tugs I will surly give it over the next decade of use.

I just finished up lunch and will head outside to start work on this tuba for the first time in about eight weeks.

Here is a link to my online album of this project. If you are interested, the entire process has been documented there, and was the source material for my old TubeNet thread.

1971 Mirafone 186 CC — "Dog Piss"


Image
User avatar
the elephant
Posts: 3321
Joined: Thu Aug 13, 2020 8:39 am
Location: 404 - Not Found
Has thanked: 1861 times
Been thanked: 1297 times

Re: 1971 Mirafone 186 CC — A Continuation

Post by the elephant »

LEADPIPES: I got 'em.

One of the nice things about this horn was that when I bought it there was a 188 leadpipe installed. It did not fit well at all, however, as it was bent to fit a 188, which is wider than the 186 at this point. It was sold to the PO as a nickel silver 186 pipe, but about five minutes with my calipers and a ruler proved it to be the larger pipe. It was a fantastic playing horn, too, like that. Or it was *for me* (which in the end is all that counts)…

I decided to get a regular 186 leadpipe so that it would fit correctly and eventually allow me to install a 5th valve. The 188 leadpipe had to be installed crooked to the point where a 5th valve would not have fit at all. However, the horn was a bit diminished, orchestrally, with the standard, slower-tapering 186 pipe. It was still a gem of a find for me, but it was less capable without some more aggressive, vigorous effort on my part. But the horn really did need that 5th valve, so all that ended up being done.

After the horn was back in playing condition I began my quest for a 186 leadpipe using the fatter 188 tube. This cost me a lot and took months to get, with one rejected pipe along the way. Miraphone was *very* accommodating and I think the pipe I now have will both fit correctly *and* play like the original one that I had to remove.

Here is a pic showing most of the Miraphone leadpipes I currently have. The misshapen 188 pipe the horn came with is not in the photo as it is on a King tuba right now.


From the top down: BBb 186 that I cut to CC, the first try by Miraphone that does not fit my horn and is too long, the new version that was fit to a new 186 borrowed from the production line, a genuine, seamed NOS 1978 (skinny leadpipe era) with the pipe running all the way through the receiver, which is actually just a sleeve, and a 1974 180 F leadpipe just for fun.
Image

The two new, nickel silver pipes, the "good" one on the bottom. You can see that (even if I trim the end) that that loopy bit at the top will make the pipe too long by at least an inch. The lower pipe is much closer to the shape of a 186 pipe, but still has the overly-round curves, probably due to my choice to use NS rather than the much easier to bend yellow brass. The technician assured Eva that this pipe matches the hydro-formed 186 leadpipe in length, and that it fits a modern 186 properly, despite the slight differences in shape. We shall see, but next to one another the leadpipe on the horn and this one do look to be compatible. Fingers crossed.
Image

Here is that 1978 pipe bent decades ago to fit on a classic (and slightly more narrow) 186 with the new 188 pipe bent to fit a modern, wider 186. The NS pipe is just a bit wider around the bell as it lives about five millimeters off of the bell surface, and the point where the pipe bends away from the top bow is fit for a bell that is a quarter-inch farther away than the classic one where the bell and top bow nearly touch.
Image
Image
User avatar
the elephant
Posts: 3321
Joined: Thu Aug 13, 2020 8:39 am
Location: 404 - Not Found
Has thanked: 1861 times
Been thanked: 1297 times

Re: 1971 Mirafone 186 CC — A Continuation

Post by the elephant »

Today I got back to work after about two months off from this project.

I started this next phase by trimming off the stub ends from the hydraulic blowout press from a bunch of parts, then deburring and dressing the ends. After that, I cleaned up all the press gunk in my vinegar tank. once that was done I did a cursory buffing to everything to see where I would need to sand or burnish. Surprisingly enough, most of the parts lacked the horrible, pebbled finish that must be sanded and burnished smooth before serious, careful buffing can take place. But there were a number of really grainy-feeling parts that will need some attention before I can use them. I would say that at this stage these parts are about 3/4 of the way to being usable.

These are rough, unfinished parts from the factory. All the ends must be cut off as they are much smaller and thicker, and they are somewhat crumpled up at the tips from the press. Everything must be measured to ensure the ends are flat and perpendicular to the tube length and that both ends are the same length. The bits at the end after the blue tape all have to be cut off using the Dremel tool. "Black" parts are nickel silver. "Brown" parts are yellow brass. All surfaces are rough and pebbled and must be sanded or burnished before final buffing, Note that I had already buffed some of the NS crooks, and all four of the 1st crooks were trimmed and dressed, too.
Image

Here are the cut and dressed parts, having been through the vinegar bath and then one pass with the buffer. I can now easily see where the pitting is bad enough to merit some sanding, and where burnishing might be of benefit. Once the surfaces are very smooth I will buff them again. Then they will be fully finished parts, ready for installation. The parts that are brass are two lower 5th crooks and two 5th slide doglegs that will be used to build part of the 4th slide loop on my Holton 345. The large bow is the lower portion of the old-style flat major third (23) 5th valve. This was sent to me in error but I decided to keep it as I *might* install this type of 5th valve on this tuba. [I have decided that I will try to build a flat major third 5th on the Holton that would be swappable with a flat major second. If I do this and I like it as much on that horn as I did on that old 188 I used in school then I might keep it. If so, I have difficulty using horns in the same key that use different fingerings in the low register, so I would use this to convert the 186 CC to have the traditional flat major third 5th valve so they would match. This is closer to being my decision that I want to admit right now.] I really like the low F on a classic 186 using this flat major third interval 5th valve. The old-style 5th wrap is *very* and nets you a more responsive and focused low F, IMHO. The "weird" leadpipe is on top and the "good" leadpipe is below it. The remaining seven crooks are for this CC 186 — Yes, I plan to replace all my crooks with these *bling-bling* NS parts. Why? Because I want to, which is all that really matters, here. HAHAHA!!!
Image
Image
York-aholic
Posts: 1367
Joined: Thu Aug 13, 2020 10:39 pm
Location: SoCal
Has thanked: 1447 times
Been thanked: 434 times

Re: 1971 Mirafone 186 CC — A Continuation

Post by York-aholic »

Excellent write up and a very enjoyable read for me. Thank you.
Some old Yorks, Martins, and perhaps a King rotary valved CC
prairieboy1
Posts: 482
Joined: Thu Aug 13, 2020 8:37 pm
Has thanked: 428 times
Been thanked: 146 times

Re: 1971 Mirafone 186 CC — A Continuation

Post by prairieboy1 »

Terrific read. Nice to see things coming together!
:thumbsup:
1916 Holton "Mammoth" 3 valve BBb Upright Bell Tuba
1935 King "Symphony" Bass 3 valve BBb Tuba
1998 King "2341" 4 valve BBb Tuba
1970 Yamaha "321" 4 valve BBb Tuba (Yard Goat)
User avatar
Tubajug
Posts: 729
Joined: Thu Aug 13, 2020 10:27 am
Location: Nebraska
Has thanked: 220 times
Been thanked: 187 times

Re: 1971 Mirafone 186 CC — A Continuation

Post by Tubajug »

It was nice to see the full backstory of this horn again! I can't wait to read more!
Jordan
King 2341 with Holton Monster Eb Bell
King/Conn Eb Frankentuba
Pan AmeriConn BBb Helicon
Yamaha YBB-103

"No one else is placed exactly as we are in our opportune human orbits."
User avatar
the elephant
Posts: 3321
Joined: Thu Aug 13, 2020 8:39 am
Location: 404 - Not Found
Has thanked: 1861 times
Been thanked: 1297 times

Re: 1971 Mirafone 186 CC — A Continuation

Post by the elephant »

No pics, but good (for me) news!

These old 186 tubas, having so many parts that were seamed tubes that were filled and hand bent, sometimes have oddball crooks that do not really match any of the others. I have seen an old Miredafone parts list from the 1960s for dealers (I *really* wish I owned that today) that listed the 186 BBb 1st, 3rd, and 4th crooks with DIFFERENT PART NUMBERS and DESCRIPTIONS. This is important, as this means they used separate forming mandrels for each and had to produce slightly different braces to fit.

Today the CC 186 with a flat whole step 5th valve have seven slides. Four of them share the same crook and use the same brace.

For some reason, a long time ago. this was not the case. I have some of these odd sized ones, and they are anywhere between 2 and 4 mm off in "reach" from the ones used today.

What did this mean to *my* 186s? For the BBb I bought from Tabor Fisher and the CC I bought from Dan Myer it meant that after disassembly and some measuring I had to pair each crook up with its matching brace or reassembly would go very badly, since the braces are not adjustable. The length of the brace must be about a quarter to a half of a millimeter more narrow than the gap between the inside edges of the two ferrules when installed on the crook to maintain straightness between the two outer legs.

I played mix-and-match with all these parts to give me the best set of everything for the CC, leaving everything else for the BBb. That poor BBb. I am such a jerk.)

With all of the parts from the two 1978 186 tubas mixed in I ended up with a real mess. None of the 1978 crooks had the correct, matching braces. I got these off of two horns at different universities and never noticed that the parts were not fully compatible with one another, and the oddball ones are not compatible with either of the 1971 horns. (I think one was from 1977, and perhaps the 1978 horn was made after some minor adjustments in the design.)

Anyway, I played mix-and-match, as I said, and ended up with some weirdness in the BBb valve section. I bought this complete set of seven crooks in nickel silver and also purchased some 1st braces that fit the 1st crooks perfectly. Then it dawned on me that perhaps I had used one of the oddball crooks after having located a correctly-sized brace. I used some of these on my Holton, so I used the same adjustable braces that I used all over that tuba, and a slight variation in radius would not matter, but did I use all of the oddball ones on that horn?

Today I carefully measured all four of the slides on this CC 186 and they all have matching radii that also match the currently made part. That means that I can pimp out my horn with all NS crooks when I install the NS leadpipe tomorrow. I know the leadpipe will change how it played a little, but it is also a 188 leadpipe, which works really well on these older 186 tubas that came with the larger leadpipe. In fact, since this tuba came to me with the same leadpipe in the same material it will go back to playing as it did when I got it. I do not believe the crooks will change anything at all. But if I am not happy with all this I can easily put it back how it is right now.

Also, I spent about an hour measuring and examining the three 188 NS leadpipes I have along with the brass 186 pipe on the horn. I am certain it will fit correctly, now. However, the bend point as it comes out of the 5th valve is closer to the ferrule, so installing the two braces there might require that I cut the bases or I will have to bend the feet in terrible ways to get them to conform with the straight 5th slide legs and the curved leadpipe. I am not happy about that, but it really isn't such a big deal.

Tomorrow, weather permitting, I will be swapping the leadpipes and rebuilding the upper 5th slide. I hope to also install all those crooks and take out a nasty dent I stupidly put into one part. (D'OH!)

The wife and I spent a lot of time cleaning up the shop and reorganizing all the project boxes so I can more easily find stuff.

For not actually *doing* anything I sure did a lot today. I burned up six hours somehow.

I am sorry these posts of mine are so "chatty" but I write like I speak, which means way too much! I am not demanding anyone read any of this stuff. I write it for (heh, heh) the "therapeutic value", like a diary. I take a lot of crap off of some people for this, which baffles me. If you hate my posts then why slog through them? Is your goal specifically to complain about them to me or to make fun of me? I would rather people not read my posts at all than for them to feel they have to, they complain to me about the length of them. Seriously, I do not understand people who do this. Please, find some other way to boost your ego. I am just writing about something I love deeply. I don't freaking *care* if you don't like it. But you do not need to give me crap about it. Just go away. Thanks.

For those of you who actually read my stuff and get something from it I am always grateful for *any* audience with whom to share what I love doing. To me this is an outlet, like a public diary that others can read or ignore. It is not an instruction manual but a story.

I will try to write less, though.

And despite the virus and all the mountains of garbage falling down on my life right now it was still a pretty good day because I got to do this work.

:cheers:
Image
York-aholic
Posts: 1367
Joined: Thu Aug 13, 2020 10:39 pm
Location: SoCal
Has thanked: 1447 times
Been thanked: 434 times

Re: 1971 Mirafone 186 CC — A Continuation

Post by York-aholic »

Like in many pursuits, an hour spent planning/not doing anything may be more productive than two hours in the actual “doing” work.
Some old Yorks, Martins, and perhaps a King rotary valved CC
User avatar
bloke
Mid South Music
Posts: 18671
Joined: Thu Aug 13, 2020 8:55 am
Location: western Tennessee - near Memphis
Has thanked: 3677 times
Been thanked: 3946 times

Re: 1971 Mirafone 186 CC — A Continuation

Post by bloke »

What Wade got done today is geometrically more "cool" (and more along the lines of stuff that I would have liked to have been doing) than what I got done...
I concreted some recycled 4x4's in the ground, so that I can (eventually) store hay behind a wall on pallets, and keep Mrs. bloke's friends out of it (until they're supposed to have it)...
...and Wade was using a micrometer or calipers, whereas I was using a curb-treasure level and a not-yet-burned 4-foot-long discard board (for spacing).

As I understand it, this is C-tuba #2...that is being cut down from that old distressed B-flat...yes?
User avatar
the elephant
Posts: 3321
Joined: Thu Aug 13, 2020 8:39 am
Location: 404 - Not Found
Has thanked: 1861 times
Been thanked: 1297 times

Re: 1971 Mirafone 186 CC — A Continuation

Post by the elephant »

Well, here we go…

Chapter 1

I bought an exceptional 1971 186-4U CC in 2018 that needed to have a lot of things fixed, upgraded, or replaced in order for me to want to make it a "work horn" and not just a "fun horn". It played wonderfully but did not come with a 5th valve. All four rotors leaked and needed the bearings to be heavily swaged, some of the slides would leak if pulled beyond a certain distance, and the bell and outer branches were looking a bit more "hand-hammered" that I like, with literally hundreds of dents and flat spots. However, there was NO MAJOR DAMAGE ANYWHERE. This quickly became the favorite horn of our trombone section. I decided to fully restore it, which required a large budget to net me what would end up being a mechanically new instrument using classic parts.

As a source for period parts made the old way, I purchased a 1971 186 BBb "wall hanger" that was nearly complete, but it sported many holes and cracks in the bell and both outer branches. The valves were actually still acceptable and (like the CC) the inner branches were nearly perfect. After some time putzing around with this horn (like swiping the water key assembly and some braces) I decided that the 'wall hanger" could probably be fixed and I might be able to flip it to help pay for all the spendy parts I was about to need for the CC restoration.

As things developed, I decided to try to cut the BBb to CC purely for the experience and for fun, as both BBb and CC classic 186 tubas are not on any known Endangered Species list. None of the "Never Cutters" could possibly protest me doing this, since in the process I would be SAVING an old tuba from the scrap heap. I wanted to finally discover *exactly* what is different between the BBb and CC 186s.

The CC is receiving lots more small work and attention to mechanical things now, but I have been performing on it and it is pretty darned great for my needs and desires for a horn for regular use at my job.
_______________________________________________________

Chapter 2

The BBb has actually been a CC for some time, now, but I have not yet finished filling cracks and holes in the bottom bow, which is very badly trashed. The severe damage to the top bow and bell was repaired (with varying cosmetic but complete acoustical success) and is nearing the point when I can reassemble the instrument. The top bow and two of the inner branches are together and the valve section is also ready to go. The 5th branch (the pretzel) is in need of two complicated cuts to be able to fit within the smaller CC space and actually may have to be a part I purchase to make things work. I have all the 4th slide parts hacked up to make a CC 4th slide circuit, but am not ready to install it. I opted to use a regularly ported rotor over buying another dedicated 5th valve, so I had to fudge the same way that you did with the top slide to get things to work. I also will be using the wider, lower 5th crook, but I will be able to make the lower slide normally, using the same sized crook. On mine, the extension to the narrower crook moves toward the 1st slide rather than out to the side. I will have to trim a half-inch from the already short slides, but it will work fine. I have all the lever and linkage parts ready to go.

The valves have all been carefully picked from my box of about 20 different (and old) 186 valves. They come from three different horns and all have fast, quiet action with tightened bearings using the tool you use in a vise and not the one for horns that you hammer on. The results from these last a lot longer than the one that just crimps the edge of the bearing sleeve over the stem of the valve. It crimps them down about 3/16" to maybe 1/4" (if I am a mean SOB to the valve) and I have never had one wear down on me and become loose again. It is an overly brutal tool making the casing unusable with a brand new rotor, but hey, they are old and they do not leak and the action is good. Who cares?

So I bought a lot of new stuff for the CC, and the BBb inherited all of the old parts. I am trying to make a good horn from a cracked, holed junker with next to zero additional cost after the initial investment of very little money. This would not be possible if I did not have lots of donor parts from the CC and I would not have tried this if both horns were not sitting next to each other while I sat sucking down coffee and scratching the old pate.
_______________________________________________________

Chapter 3

THE CC
So far I have netted a really nice (by my standard) classic CC that is very big and open with the sound I want, but with only a little of the crassness, these horns are known for when you step on it. There is just enough to make my point when I need it but it can be made to disappear so I can play "big horn" loudly on some works. It works well both as a Tchaikovsky-esque brass-bass type of voice *and* as a Prokofiev-esque floor-for-the-orchestra type of voice, IMHO.

THE BBb
Further, I will eventually net an "unknown quantity" 186-5U CC made from the original branches, bell, and slide parts, using five carefully chosen valves and nickel silver guards inherited from the other horn that, while not new looking, are in decent shape. (The outer branches were so badly damaged that the guards are pretty much trash. I will smooth them out and try to reshape them to fit horns with wider outer branches because they are now too wide and open for a 186 and I don't own the type of heads for my Z60 to do that sort of work. I have the heads that come with it, that allow you to butcher stuff. HAHAHA!!! I also own some power discs and stuff like that, but no super narrow rollers that can close up a compound curve in both planes. I will eventually get those. I know how to do the work and know that if I try it with what I have I will just screw up the old guards from the BBb horn. Oh, well. I know my limitations.

OBSERVATIONS
The cut horn will not play the same as a real CC because the branches are skinnier than those of the CC. Miraphone makes up for the 24 fewer inches that help give the BBb a solid tone with some weight by increasing the fluid volume of all the inner branches and most of the top bow. None of the parts are shared. The bottom bow is the same, but with about an inch and a half cut from the small side, using a different ferrule to connect to a very different top bow. I could not easily "get" this until I held both BBb and CC branches next to one another AFTER the BBb parts had been cut to the length of the CC parts. Definitely, 100% certain, skinnier parts with a different rate of taper, the CC being much faster.

CONCLUSION
So I got one great tuba that I improved and one junker that *might* end up being an excellent quintet tuba, much like a large 185 (for lack of a better term). These two tubas were made within six months of one another. The bells and outer branches ought to generate a very similar tone, with the smaller inner branches of the cut horn giving it more focus but with a little less power and projection than a factory CC 186 and a lot less than my "fat leadpipe" horn.

I don't really know what will happen, and this not knowing is a huge part of the fun factor for me. I like learning about engineering in a hands-on manner.
Last edited by the elephant on Fri Oct 16, 2020 9:08 pm, edited 2 times in total.
Image
prairieboy1
Posts: 482
Joined: Thu Aug 13, 2020 8:37 pm
Has thanked: 428 times
Been thanked: 146 times

Re: 1971 Mirafone 186 CC — A Continuation

Post by prairieboy1 »

Keep posting and keep chatting. You are a great storyteller of this tuba adventure! :clap: :clap: :clap:
1916 Holton "Mammoth" 3 valve BBb Upright Bell Tuba
1935 King "Symphony" Bass 3 valve BBb Tuba
1998 King "2341" 4 valve BBb Tuba
1970 Yamaha "321" 4 valve BBb Tuba (Yard Goat)
User avatar
the elephant
Posts: 3321
Joined: Thu Aug 13, 2020 8:39 am
Location: 404 - Not Found
Has thanked: 1861 times
Been thanked: 1297 times

Re: 1971 Mirafone 186 CC — A Continuation

Post by the elephant »

prairieboy1 wrote: Fri Oct 16, 2020 8:53 pm Keep posting and keep chatting. You are a great storyteller of this tuba adventure! :clap: :clap: :clap:
:coffee:
Image
User avatar
the elephant
Posts: 3321
Joined: Thu Aug 13, 2020 8:39 am
Location: 404 - Not Found
Has thanked: 1861 times
Been thanked: 1297 times

Re: 1971 Mirafone 186 CC — A Continuation

Post by the elephant »

This will be my final attempt to align the branches of this tuba before I have it crushed and melted. Just kidding; I love this tuba.

When I reassembled it the last time the top bow was clocked wrong next to the bell. I have no understanding of why this happened as I reused all previous brace telltales for alignment. However, despite my best efforts, the whole valve section protruded too far forward of the bell. The paddles stuck up far above the horn so that I was worried that damage could occur in the gig bag.

The only real issue for me (other than my brain nagging at me to fix this) was that you could reach the 5th lever if the thumb ring is installed. Switching to the old-style lever exacerbated this.

To fix it would mean removing the bell and bottom bow, cleaning every solder contact point, and then reassembling it all — potentially hours of work. I decided to wait until I had gigged with it to see if it was worth it to me to do this.

It was.

So today I did all this. However, I have been having *remarkable* luck with "cheating" by heating parts and just bending the joint so that they were lined up correctly. Every time I have done this it has worked and saved me hours of work. I don't get it, and I don't want to. I just hope this luck continues.

And today I removed three braces, heated up the bottom-to-top bow ferrule, and twisted that sucker until it *looked* right. (I had long, straight tubes installed in the 2nd and main slide spots to ensure that the cave section did not get clocked too low. I had the new leadpipe with its little brace to keep it off the bell laid out to make sure it went far enough. Perfect!)

To get the custom leadpipe to be centered on the bell, I had to 1.) mount it off the bell, and 2.) use a longer brace to open up the gap between the bell and top bow to the needed length. The brace Miraphone sold me for this purpose was too narrow, so it is probably the wrong one.

Once the bell was pushed far enough away from the top bow this caused the bottom bow to cant out and down a bit, opening the gaps between the bottom bow and the 3rd branch on both sides, so now neither brace is large enough for those gaps. I will order two custom braces to fix this. (Yes, they can do this for you, but you must provide them with the exact number they need, and understand what it is that you are measuring.)

Image

A Bottom Bow Brase Up THERE? SERIOUSLY? — Yeah, so the brace Miraphone sold me was not nearly long enough to create the distance needed to shift the bell over to the center of it's "hoop" for this custom-bent pipe. I stole the next brace down (bottom bow large side to 3rd branch) and forced the gap open. Et voila! the leadpipe fits perfectly now.

Go figure.
Image

More MTS Pain — Okay, so the valve section is shifted over at the 4th runners by about 3 mm and this causes the water key elbow to not contact the 5th branch pretzel. This is annoying, but I can live with it as it seems to be the only real alignment error on the horn now. The ferrules were fused to the runners, so I could not push them on far enough. This traveled down the assembly trail to end with this error.

That gap was there last time, and I found a trick little brace that filled the gap perfectly. Now that gap is a bit larger, so I have to locate another tiny brace that will work better.

Dammit…
Image

The Magic Leadpipe — It's here. It fits. But I had to correct the sins of the last assembly. After the valve section was re-clocked and the bell brace was changed, this leadpipe fit just fine.

I think the stock one has some possible alignment slop designed into it, allowing for a slight variance between each 186 produced. This one was hand-bent to exactly fit one example of a 186 randomly pulled out of production, so it fits *that* 186 rather than *any* 186. I had a stock pipe on this 186 and it fit just fine, but this pipe did not fit at all. Once the known alignment corrections were made it fit perfectly. And you know what? The stock pipe still fits the tuba just fine.

So there it is.

[In the photo, the bell brace is not in place so the leadpipe is lying directly on the bell. However, it truly *does* fit the horn now, which makes me quite happy!]

Image
Image
Shawn
Posts: 130
Joined: Mon Aug 17, 2020 12:01 pm
Location: Canada
Has thanked: 0
Been thanked: 1 time

Re: 1971 Mirafone 186 CC — A Continuation

Post by Shawn »

Amazing work, great write-up.
Really get the sense it's a labour of love.
User avatar
Casca Grossa
Posts: 329
Joined: Thu Aug 13, 2020 11:06 am
Location: Reading, PA, United States
Has thanked: 233 times
Been thanked: 152 times

Re: 1971 Mirafone 186 CC — A Continuation

Post by Casca Grossa »

Shawn wrote: Fri Oct 23, 2020 8:20 am Amazing work, great write-up.
Really get the sense it's a labour of love.
Wade has the best detail. I am sure he could monetize these write ups but I am glad they are free.
Mirafone 184 CC
Blokepiece Imperial
Soon to be 5 valve Lignatone/Amati Eb
Blokepiece Solo
User avatar
the elephant
Posts: 3321
Joined: Thu Aug 13, 2020 8:39 am
Location: 404 - Not Found
Has thanked: 1861 times
Been thanked: 1297 times

Re: 1971 Mirafone 186 CC — A Continuation

Post by the elephant »

By taking measurements from my Mack 410 I have discovered that a small error that I knew about when I committed it (in order to prevent my having to order more parts) is the main culprit, with that error terminating at a point that had been damaged. With that damage fixed the parts at that location no longer fit like they did when I initially disassembled the instrument. This means that I have a newly reshaped space that has to meet up with a small error that has magnified through the wrap of the horn.

I am fixing that now. I pulled the bell and bottom bow off and will rework everything a tiny bit, which will correct the issue on the one end. On the other, I have decided to DELETE the huge post brace between the bottom bow and the lower MTS leg. Miraphone dumped this difficult-to-work-with brace years ago, like in the 1990s. Their solution was to place a brace between that same MTS leg and the lower loop of the 3rd slide circuit. This ties the final location of the MTS solely to the valve section and does not include the bugle at all, which is *must* easier to work with.

I even have an old brace from the BBb 186 that fits the space. Nice!

I will adjust that brace's feet to fit the space correctly and will install it. Next will be a lot of work to the slides and then I will make some adjustments to the angle of the valve section as it hangs on the inner branches. If you are looking at the tuba from the front, I need to rotate the entire valve set about 3º clockwise, which will be a PITA but will completely solve several issues. I will explain more after it is done and I have pics.

Here is where things are right now…

All torn up again. It played so well, too. <sigh>
Image

All this back-and-forth work will be worth it in the end…
Image

Here is the brace that will work between the lower MTS and the lower 3rd loop. After being all bent up to the correct angles I think it will be about 2 mm too short. I have the post blank and two new feet, so I will probably file the blank to hold the feet at the correct angles and then silver solder that together, so I can save this brace for use elsewhere.
Image

This is the brace between the 1st slide and the 4th branch (which is the inner top bow in my nomenclature system). Using the original solder pad telltales this is how things lined up. It is wrong and needs to be upright. I can't make it fit this way due to that small error in one of the 4th slide tubes. If I can correct that error the valve section can be set on the inner branches correctly, solving several issues.
Image
Image
User avatar
the elephant
Posts: 3321
Joined: Thu Aug 13, 2020 8:39 am
Location: 404 - Not Found
Has thanked: 1861 times
Been thanked: 1297 times

Re: 1971 Mirafone 186 CC — A Continuation

Post by the elephant »

This covers my decision to NOT destroy a Miraphone brace but to use Jin Bao parts to copy the needed brace for the MTS. I also cleaned up a lot of mess and then installed three of the seven nickel silver crooks.

Okay, on to the HornPorn®

I am making the replacement MTS brace to delete the huge one from the MTS to the bottom bow. This is a copy of what Miraphone uses today, made from Jin Bao parts and altered to fit the very weird space. I silver soldered the straight foot to the post first, then I placed the post in the space where it was needed so I could better gauge the angle the post had to be trimmed to, as well as how much shorter it would need to be.
Image

Same thing, different angle. I like the blue flame and the red glow of the metal.
Image

Finished. Next, I will make sure it fits, and then run it through the pickle bath and the buffer.
Image

On the left is the original Miraphone brace from the old BBb parts horn. On the right, you can see what I actually needed, as well as why I opted to not bend the one on the left into this shape. Making a brace that fits well and does not look mangled was rewarding. I will clean up the excess solder later.
Image

It fits without adjustment. It is not perfect, but it will do nicely.
Image

Installed! I did my normal, extra step of pre-cleaning so that when I really go after excess solder and scratches and such I can more easily see where the effort needs to be made.
Image

This is where things stood when I hung it up for today. The MTS is well aligned with the valve section; each axis of the three look very straight to me. Well, straight enough. I installed the MTS brace I cut and fit, and I adjusted the tiny pin brace that negates my slight alignment error in the valve section. All the solder pads have been sanded and buffed off so I am free to solder the bottom bow and bell braces where they best fit. I also installed three of the seven nickel silver crooks.
Image

Corrected and braced, the MTS area now looks as it should.
Image

This is the miracle mini brace that allows my stupidity to run amok and unchecked with no ill effects. I had to Dremel away material from both feet to get it to fit into the now-narrower gap. It worked out very nicely, though I have no idea what it came from; it just sort of appeared when I needed it. It's like the Brace of Gryffindor. Weird…
Image

Nickel silver MTS crook. Me likey.
Image

Here is my new MTS brace from the underneath/backside. I know it's not fully cleaned up. I'll get to it in time.
Image

Third slide NS crook…
Image

Fourth slide NS crook…
Image
Image
User avatar
Casca Grossa
Posts: 329
Joined: Thu Aug 13, 2020 11:06 am
Location: Reading, PA, United States
Has thanked: 233 times
Been thanked: 152 times

Re: 1971 Mirafone 186 CC — A Continuation

Post by Casca Grossa »

:smilie8:
Mirafone 184 CC
Blokepiece Imperial
Soon to be 5 valve Lignatone/Amati Eb
Blokepiece Solo
prairieboy1
Posts: 482
Joined: Thu Aug 13, 2020 8:37 pm
Has thanked: 428 times
Been thanked: 146 times

Re: 1971 Mirafone 186 CC — A Continuation

Post by prairieboy1 »

:clap: :tuba: :clap: :tuba:
1916 Holton "Mammoth" 3 valve BBb Upright Bell Tuba
1935 King "Symphony" Bass 3 valve BBb Tuba
1998 King "2341" 4 valve BBb Tuba
1970 Yamaha "321" 4 valve BBb Tuba (Yard Goat)
hrender
Posts: 1900
Joined: Thu Aug 13, 2020 8:18 am
Has thanked: 583 times
Been thanked: 292 times

Re: 1971 Mirafone 186 CC — A Continuation

Post by hrender »

That's a slick piece of work.
Post Reply